Venom is a popular video addon that boasts a comprehensive list of media content such as Movies and TV shows. It’s a standalone addon and does not require any other apps or installation for streaming the content on Kodi. For cinephiles out there, whose day doesn’t end without watching a movie or TV show can rely on Venom addon to fulfill their streaming requirements. The addon is fairly easy to use and can be installed on Kodi without any complications.
We personally recommend Venom Kodi addon over other video addons simply because of the vast array of movies and TV shows it offers, combined with a straightforward interface. Loads of Kodi users are using the addon lately since it fetches high-quality streams only. The addon works great with real-debrid so we have also added venom in our Top Kodi Addons List. In this guide, We have shared the steps through which you can install Venom addon on Kodi in just a couple of minutes.
The installation guide for Venom add-on is the same across all the Kodi supported devices such as Amazon Firestick, Fire TV, FireStick 4k, Windows, Mac, Android TV Box, etc.
Table of Contents
How To Install Venom Addon on Kodi
Please keep in mind that whatever content you’re streaming on Kodi is clearly visible to your Internet Service Provider (ISP) and local authorities of your region. Kodi addons & builds offer unlimited free streaming but could also get you in legal trouble if your ISP & government found copyrighted content (Movies/TV Shows/Sports) on your Kodi. Therefore, you must be cautious and use a secure connection while using Kodi.
A VPN will help you in masking your IP address, making it impossible for anyone on the internet to track down your online activities. Not only it helps you maintain your anonymity on the Internet, but it also lets you unblock geo-restricted content. Well, there are quite a lot of VPNs available on the internet to choose from. However, the only one we believe to reliable and wholeheartedly recommend is the IPVanish VPN for Kodi.
IPVanish VPN is one of the most secure and fastest VPN in the industry. Moreover, IPVanish VPN comes with a 30-day money-back guarantee. Click here to Get 46% off IPVanish VPN.
This offer will expire soon.
Before we jump into the installation guide outrightly, there’s something that you must take care of. As you may already know, Venom is a third party addon that can not be installed unless and until you enable Unknown Sources. Make sure to enable the same using these steps:-
- Go to the Settings simply by clicking on the Gear icon on the home screen.
- Select and Open System Settings option to see further options.
- Open up the Addons tab located on the left side of the interface.
- Find Unknown Sources on the right side and enable it by toggling.
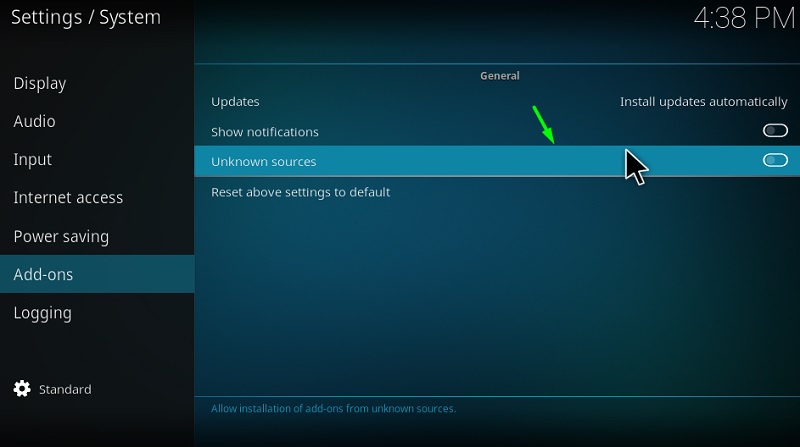
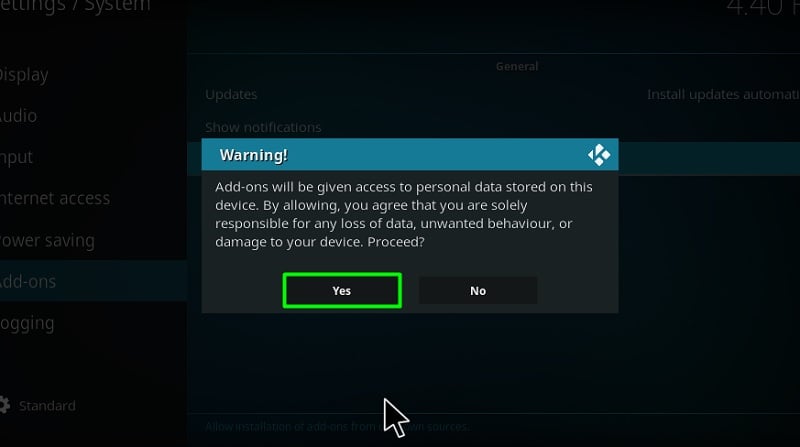
- Click Yes if you see any warning prompt.
- Now close the Settings by hitting the back button on your device.
The process of installing Venom Kodi addon is pretty much the same on both Kodi Leia and Kodi krypton versions.
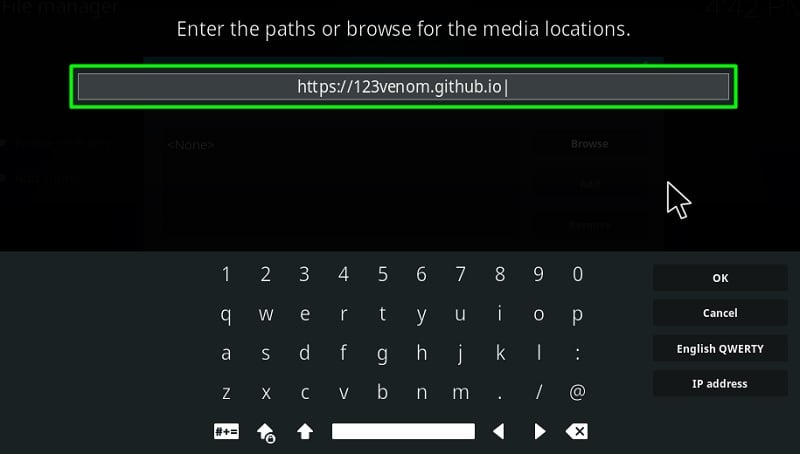
- Head over to the Settings Menu once again by selecting the Gear icon.
- Select the File Manager option from the list to proceed further.
- Choose Add Source from the list options shown on the right side of your screen.
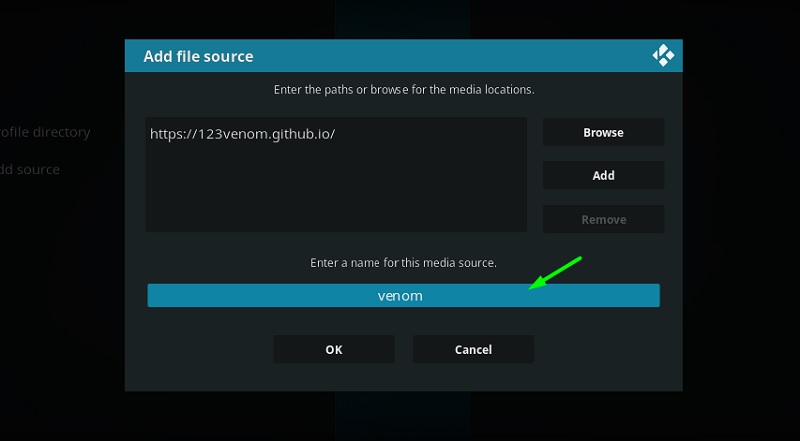
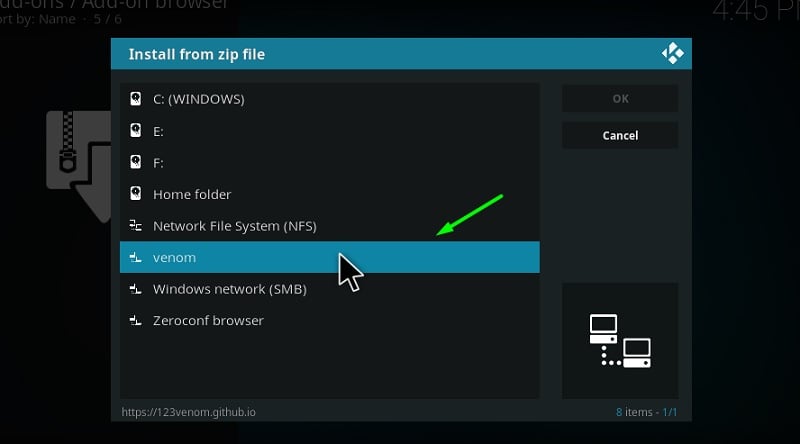
- On your screen, a pop up would appear, simply select and replace the NONE text with the following URL – https://123venom.github.io make sure to double-check properly after entering.
- In the following field, enter Venom or any other name for the above source path and hit OK option.
- Navigate back to the Settings Menu screen and select Add Ons option over there.
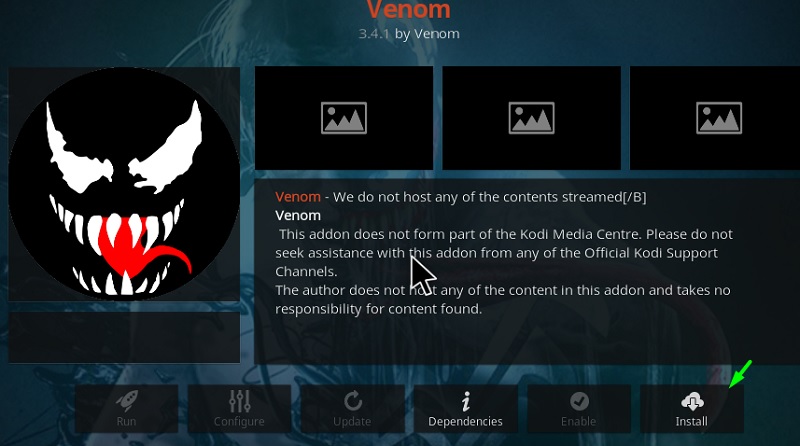
- Proceed by selecting Install from Zip File option and select Venom from the list media sources shown on your screen.
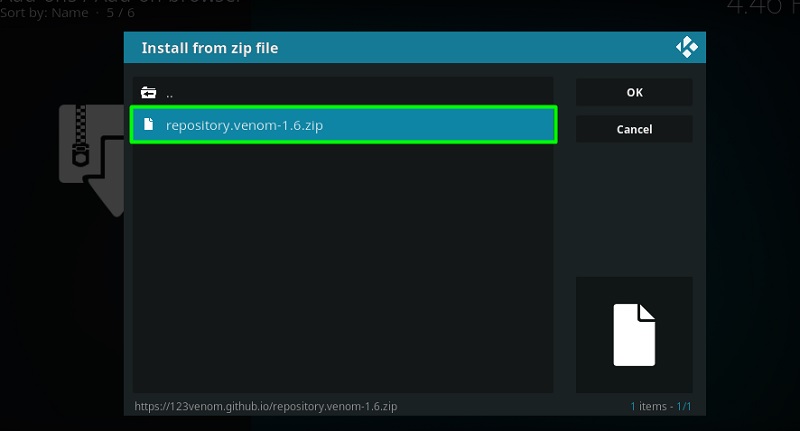
- Click on the repository.venom.zip file and wait for the repo to install successfully.
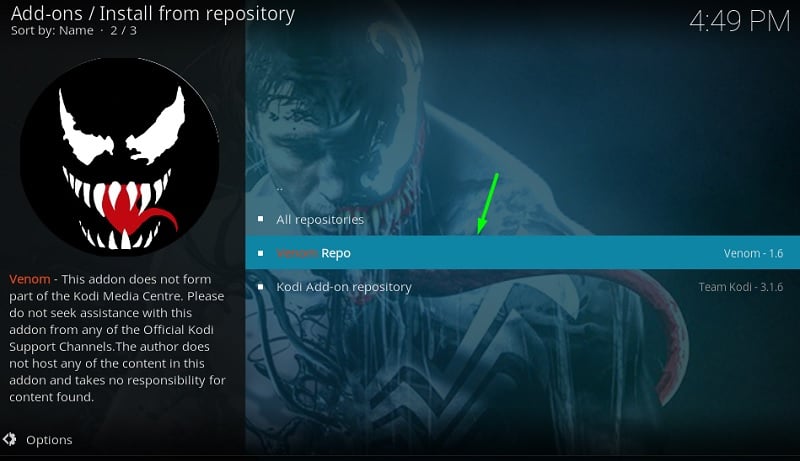
- Upon receiving the notification of successful Venom repo installation, select the Install From Repository option from the same screen to proceed further.
- Select Venom Repo.
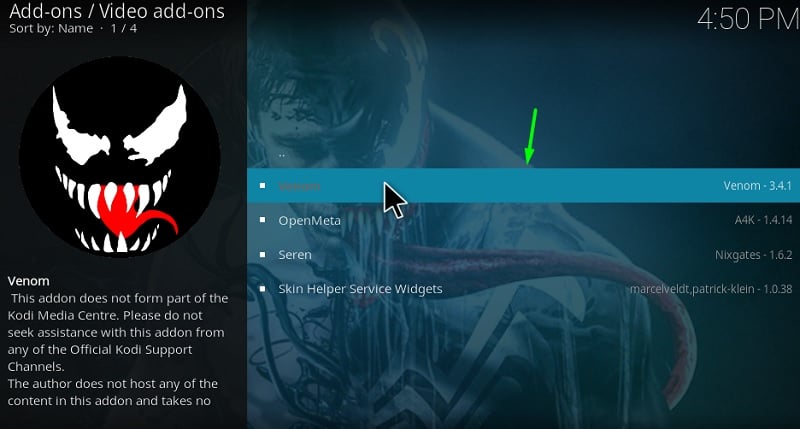
- Click Video Addon on the next screen.
- Select Venom
- Click Install option over there and wait for the installation to complete.
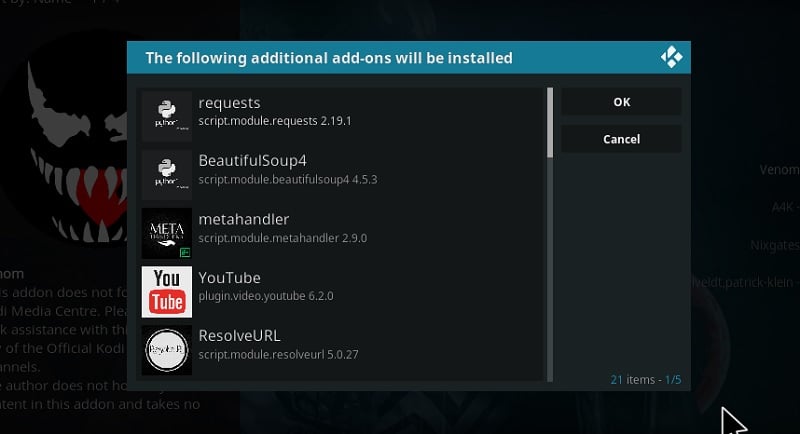
- During the process, you will receive a popup window showing all the additional add ons that would be installed along with Venom, click on OK to proceed.
- After the successful installation of Venom Addon, you will receive a tiny notification pop up on your screen.
That’s it, the installation of Venom addon is now completed. You will find the installed addon under “video addons” on your Kodi app. Simply click on the Venom icon to open the addon and to start using it!
A Quick Overview of How To Use Venom Kodi Addon
As mentioned earlier, Venom is quite straightforward in terms of user experience. In fact, it doesn’t even have an interface, to begin with, and because of that, it doesn’t take any time to load the categories or titles on Kodi.
At the moment, Venom addon is strictly limited to Movies and TV shows only, there’s no other category or section like News, Sports, etc anywhere in the addon. The addons include Movies, TV Shows, My Movies, My TV show, Recently Aired, New Movies, Tools, News & Info And Change Log.
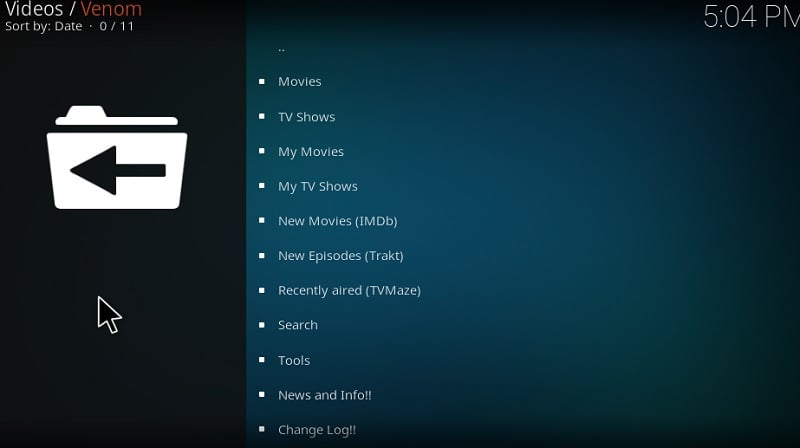
There are subcategories as well such as Upcoming, Anticipated, Popular, Top Rated, Trending which will help you in sorting the content. Using these options, you will be able to know the upcoming movies or TV shows or discover what other users are watching.
There’s also a search option on the main screen of the addon, where you can type of the name of any movie or TV show that you’re looking for. After picking up a Movie or TV show episode, the addon will automatically start looking for sources in different resolutions such as 4k, 1080p, 720p, etc. The process may take a while depending on the Movie or TV show you’ve selected, but you can track the progress from the popup window.
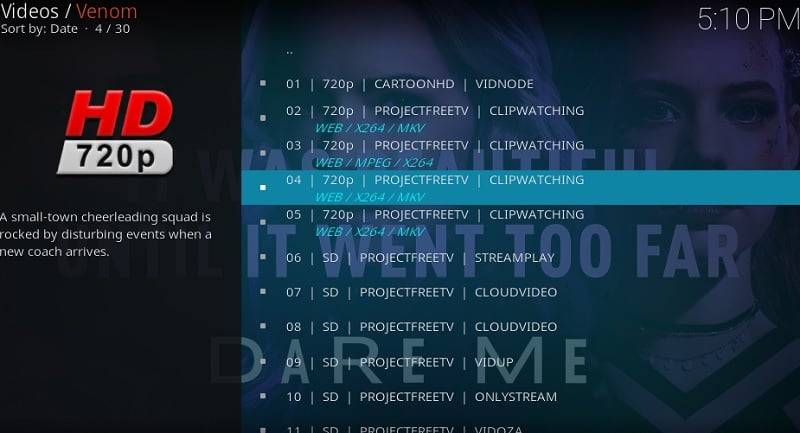
You will be shown a list of sources arranged from highest to lowest quality once the process is over. You may select any quality source based on your Internet connectivity.
For certain movies or TV show episodes, you might face “No Stream Available” pop up in case the addon is unable to find reliable sources. To fix this issue Go to Tools > Open Scrapers Settings > General > click Enable All Providers.
Related
Final Words
Venom is a reliable video streaming addon that’s been giving tough competition to other video addons on Kodi. If you’re overly concerned with the quality of the streams, then Venom is the best addon you’ll ever find on the internet. Give it a shot yourself and keep me posted with your thoughts on the addon. Also, let me know in the comments if the process was clear and easy to follow up.