Seren is a well-known video addon that provides the freedom to stream a diverse range of media content from a single menu system. It’s basically a cloud streaming service interwoven with trakt and real debrid services which takes the streaming experience to the next level on Kodi. The addon works flawlessly on any Kodi compatible device such as Firestick, PC, Firestick 4k, Fire TV Cube, Android, iOS, etc. Seren addon will give you unrestricted access to a plethora of movies and TV shows from all over the world.
Seren Add-on is only available for users with a Real-Debrid or Premiumize account. That means you need a premium subscription service to run this addon on Kodi. I personally using real-debrid and I suggest you to do the same to get high quality streaming links.
Seren is comparatively a new contender in the relative field, but it has managed to gain a significant amount of popularity in the Kodi community since its inception. If you’re looking for a way simple and reliable solution for your streaming requirements, then Seren Kodi addon would be the ideal option as per my experience.
I have been using the addon myself on Kodi for streaming various content, and the experience so far has been quite amazing. I haven’t encountered any major issues that hindered my streaming experience with the addon. In this article, I’ve shared a step by step tutorial on how to Install Seren addon on Kodi and other related guides to make the most out of it.
Table of Contents
How To Install Seren Addon On Kodi
Please keep in mind that whatever content you’re streaming on Kodi is clearly visible to your Internet Service Provider (ISP) and local authorities of your region. Kodi addons & builds offer unlimited free streaming but could also get you in legal trouble if your ISP & government found copyrighted content (Movies/TV Shows/Sports) on your Kodi. Therefore, you must be cautious and use a secure connection while using Kodi.
A VPN will help you in masking your IP address, making it impossible for anyone on the internet to track down your online activities. Not only it helps you maintain your anonymity on the Internet, but it also lets you unblock geo-restricted content. Well, there are quite a lot of VPNs available on the internet to choose from. However, the only one we believe to reliable and wholeheartedly recommend is the IPVanish VPN for Kodi.
IPVanish VPN is one of the most secure and fastest VPN in the industry. Moreover, IPVanish VPN comes with a 30-day money-back guarantee. Click here to Get 46% off IPVanish VPN.
This offer will expire soon.
Just like other Kodi addons, Seren is also fairly simple to install and takes no time to get started with the addon. However, before we jump into the installation guide, you must follow the below steps for enabling Unknown Sources in order to be able to third party addons or builds on Kodi. In case, if you have already enabled the option, then you can skip it and move to the installation part.
- Launch Kodi on your device and click on Settings Menu from the home screen.
- Now select and Open System Settings on the next screen to proceed further.
- Click on Add-ons Option in the left corner of your screen to Open up a context menu.
- Select Unknown Sources, situated in the right corner menu on your screen.
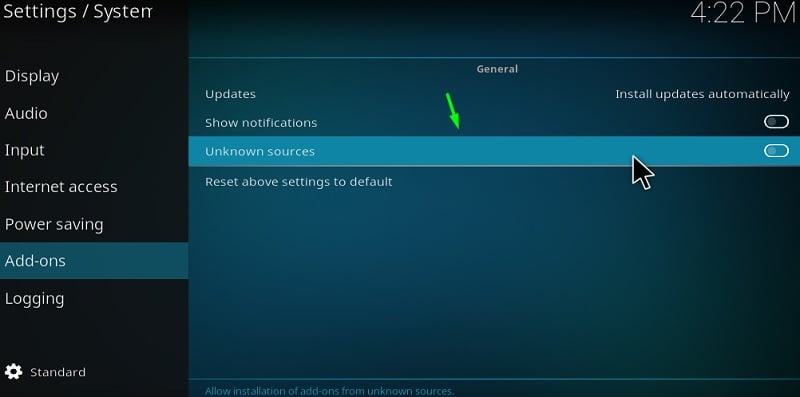
- Toggle it and select the YES option to get past the warning pop up window.
- After the option Unknown Sources is enabled, you may close the Settings.
You’re now all set to install any third-party addons or builds on your Kodi software. Go ahead and perform the following steps to install Seren addon right away.
- Firstly, Open Kodi Settings Menu by clicking on the Gear Icon.
- Click on File Manager option and select Add Source option on the next screen.
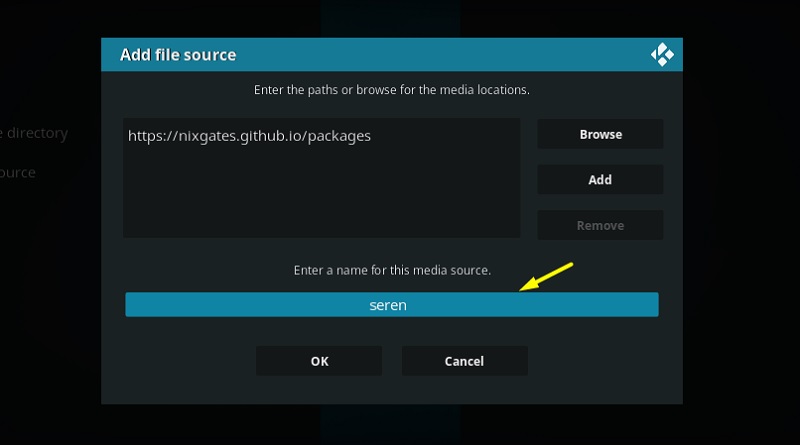
- In the pop window, click on the NONE text and enter the following URL. Make sure to type the URL properly without any spaces. [ https://nixgates.github.io/packages]
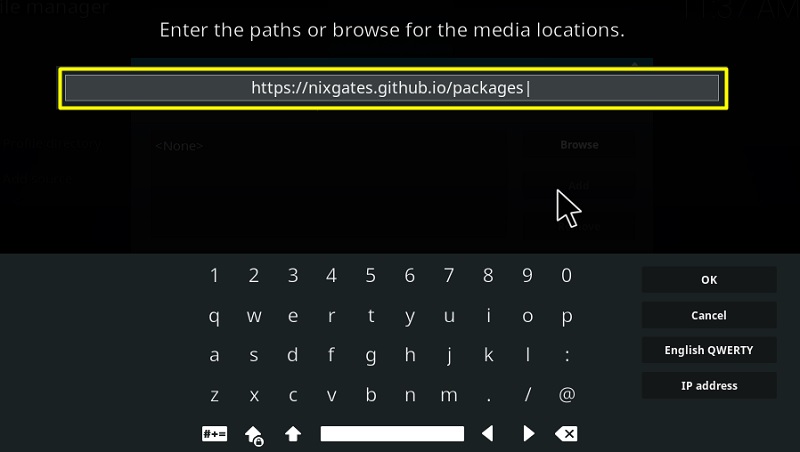
- After entering the above URL, hit OK and enter the name as Seren in the following source field to proceed.
- Once the source is added, Navigate back to the home screen and Open up the Settings menu again.
- Click on Add-ons section and select Install From Zip File option on the next screen.
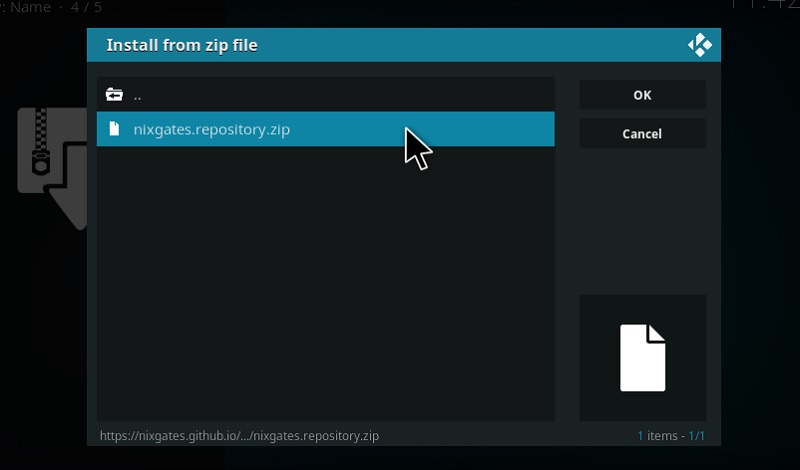
- Select Seren.
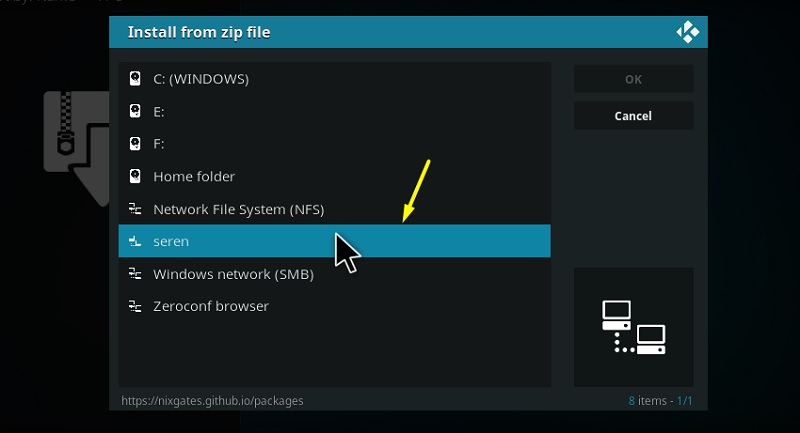
- Click on nixgates.repository.zip file.
- Within a few seconds, a notification confirming the installation of the repo will appear in the top right corner of your screen.
- Stay on the same screen and select Install From Repository option after the successful installation of the repo.
- On the next step, select the Nixgates Repo and proceed to Video addons option.
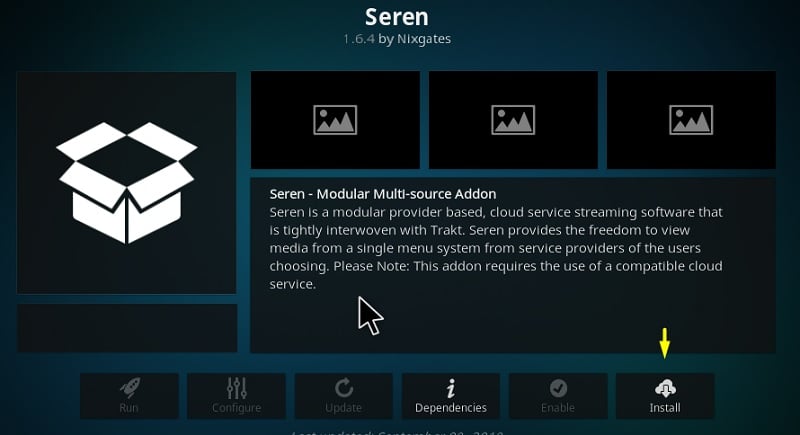
- Select Seren and hit Install option to begin the installation process.
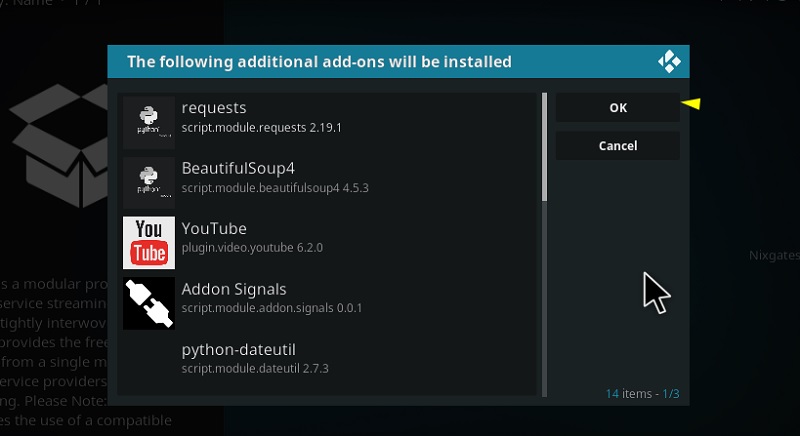
- A popup window will appear which will show you all the related addons that will be installed along with the Seren addon, hit OK to confirm.
- Now you just have to wait for a couple of seconds for the installation to complete. You would be notified after the installation is complete.
You have now successfully installed the Seren add-on on your Kodi app. To find the addon, Go to Home screen > Add Ons > Video Add Ons > Click on Seren addon to open it up. There aren’t any further installations or steps required to get started with the addon.
A Quick Overview Of Seren Kodi Addon
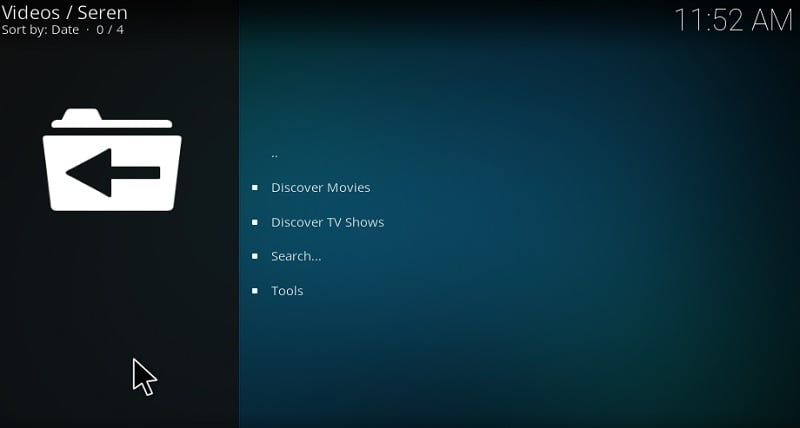
The best part about Seren addon is that it doesn’t take an exorbitant amount of time to load up when you launch it for the first time. As soon as you click on the addon, you would be directly taken to the home screen straight away where you will have to choose what you would like to watch. Upon selecting the main category, you would be able to filter TV shows or Movies by genre, actor, year, etc
There’s also a search option to quickly access the Movie or TV show title that you’re looking for! After picking up a title to stream, the addon will begin to search for premium quality links from various sources. Once the fetching is completed, the links will be arranged based on the streaming quality in descending order. You can choose any streaming link from the list as per your internet connectivity and quality preference to begin the stream.
Also, there are chances that some links may not work, but you can always go back to the source list and select any other link from there to begin the stream. The content library is updated from time to time to keep the content fresh and to keep the user hooked.
How To Integrate Real Debrid With Seren
Unfortunately, you cannot fetch streaming links on Seren without setting up your Real debrid account. In case if you aren’t aware, Real Debrid is helpful for alleviating the buffering speed on Kodi for streaming Media content. By connecting your real debrid account, the addon will fetch a premium and better quality streaming links for any TV show or Movie that you pick.
The real debrid integration process in Seren addon is quite simple, just follow the below steps and you’re all set!
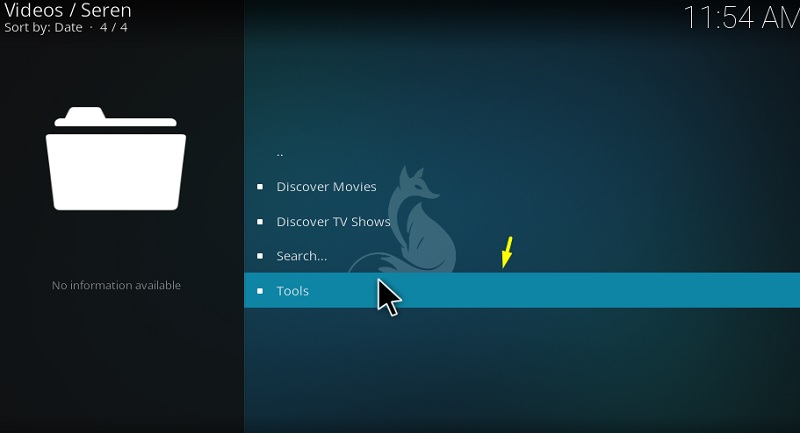
- Go to the Home screen > Add Ons > Video Addons > Open Seren addon.
- Click on Tools option from the main menu of the addon to begin the process.
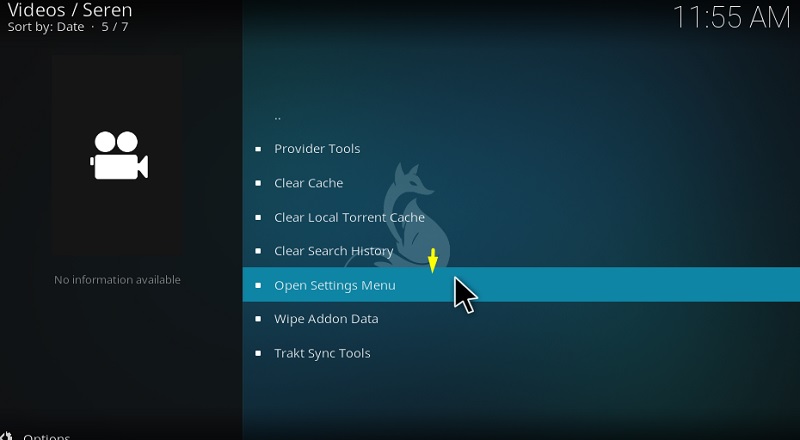
- On the next screen, click Open Settings Menu.
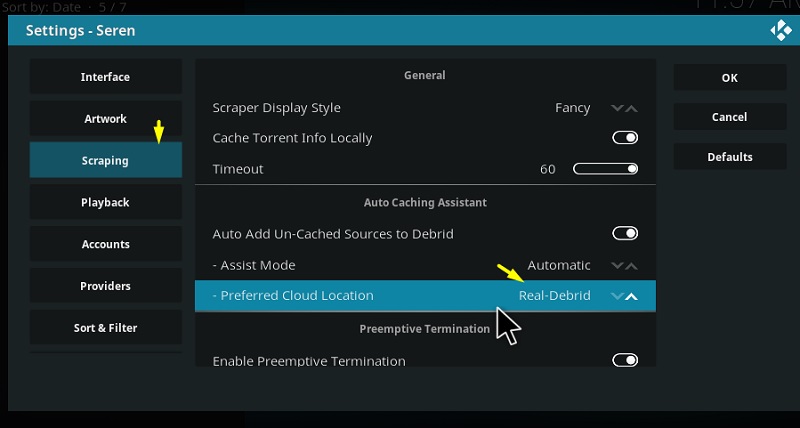
- In the top left corner, select Scrapping Option and set Preferred Cloud location to Real Debrid.
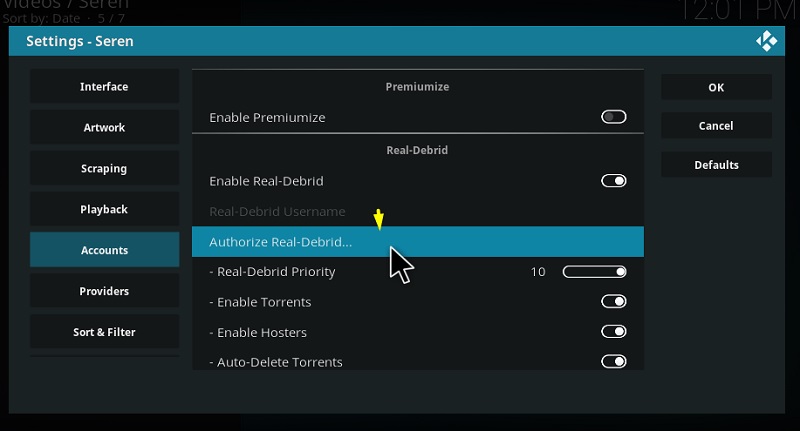
- On the same screen, click on the Accounts Tab and Enable Real Debrid Account option on the right side.
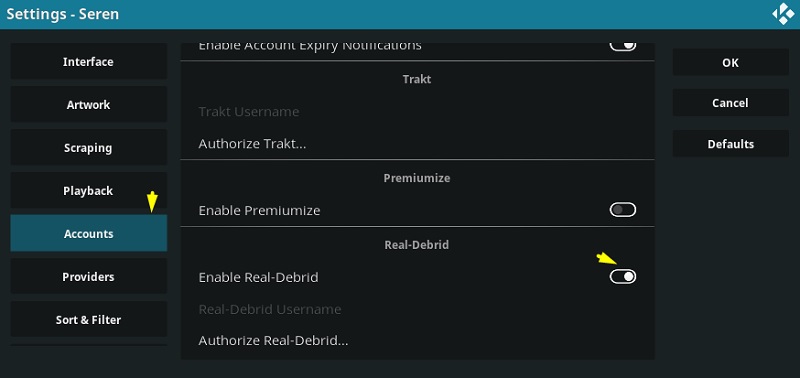
- Now scroll down a bit and click on Authorize Real Debrid Account option.
- You will receive a pop-up window with a code and the URL link, make sure to note it down.
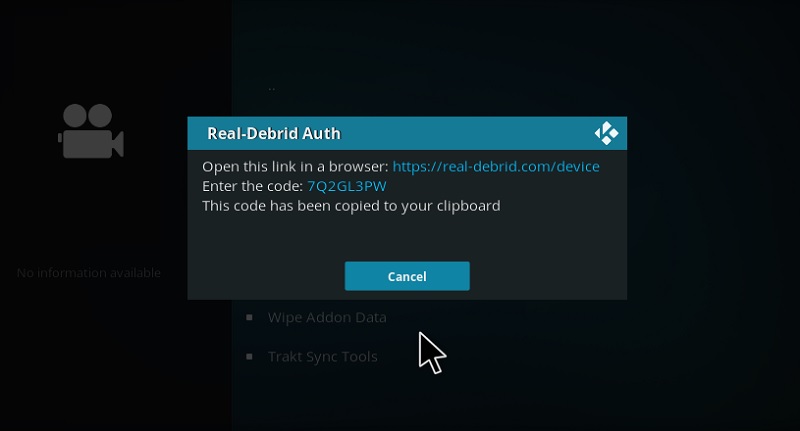
- Now open a browser on your Mobile Or PC and Go to the https://real-debrid.com/device
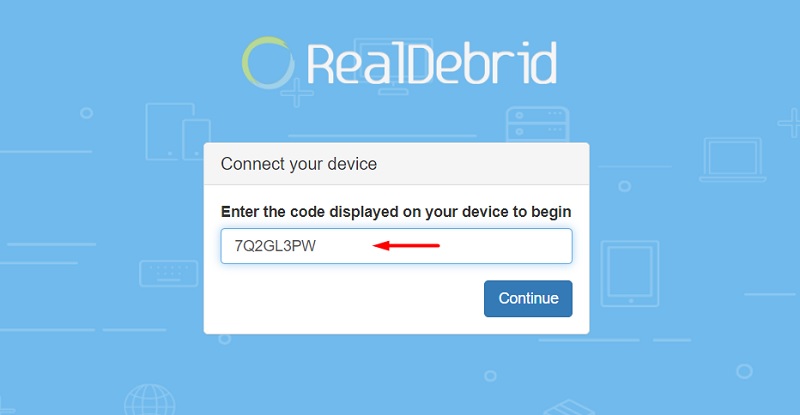
- Enter the code that you have been shown in the pop up on the web page and hit Continue option.
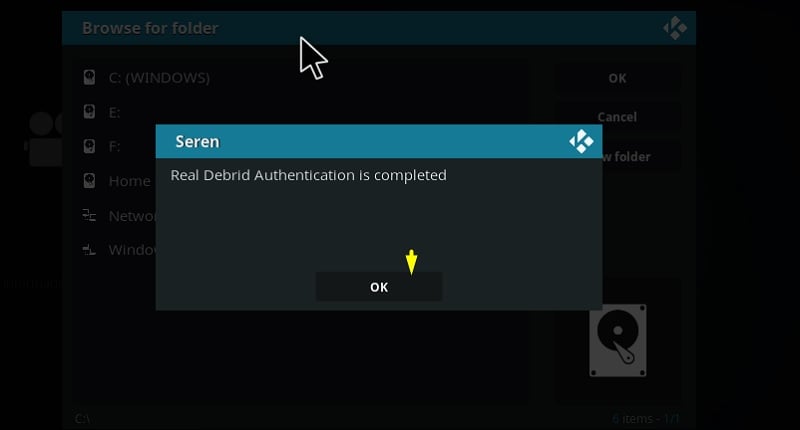
You would be asked to log in to your Real debrid account before the authorization if you aren’t logged in already. Once the authorization is approved, you will receive device authentication completed message on the Kodi app.
Note:- In case if you prefer using Premiumize over real debrid, then select the Preferred Cloud location as Premiuzie and follow the above-mentioned steps to complete the process.
How To Setup Trakt In Seren
Integrating your Trakt account would be beneficial if you’re a cinephile or someone who is very fond of media content. The primary function of Trakt is to keep track of all the movies and TV shows episodes you have watched. The steps to set up to Trakt in Seren addon are as follows:-
- Launch the Seren Add-on.
- Navigate to Tools option from the menu screen.
- Open up Settings Menu on the next screen to proceed.
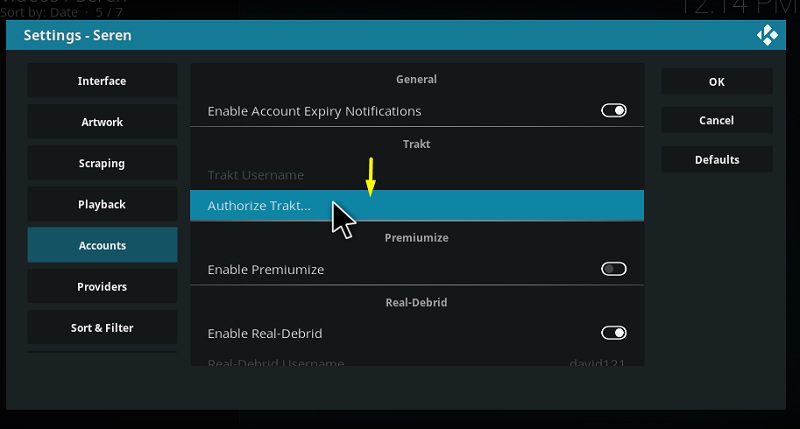
- Under the Accounts Tab, you will find Trakt related options.
- Click on Authorize Trakt option and wait for the prompt message to appear.
- Note down the code shown in the prompt message and https://trakt.tv/activate
- Now enter the same code on the web page to activate Trakt for your device.
- After successful authentication, you will receive a success prompt message on your screen.
Make sure to log in to your Trakt account on your browser app in order to authorize Trakt for seren Kodi add-on. After a successful login, you will be able to enter the code on the web page and proceed further in the process. The successful prompt message in your Kodi app indicates that Seren has been successfully paired with your Trakt account.
How to fix Seren Addon not Working?
For certain videos, you might receive No Streams Available or No Sources Playable error on your screen. Sometimes, the addon will have trouble in finding the relevant streaming sources for the requested Movie or TV show episode. If you run into such errors, then don’t worry! You can troubleshoot such errors by yourself simply by following the below-mentioned steps.
Please keep in mind that this solution may not work for everybody. However, majority of the users were able to fix the issues using this method. Anyways, let’s get started with the solution:-
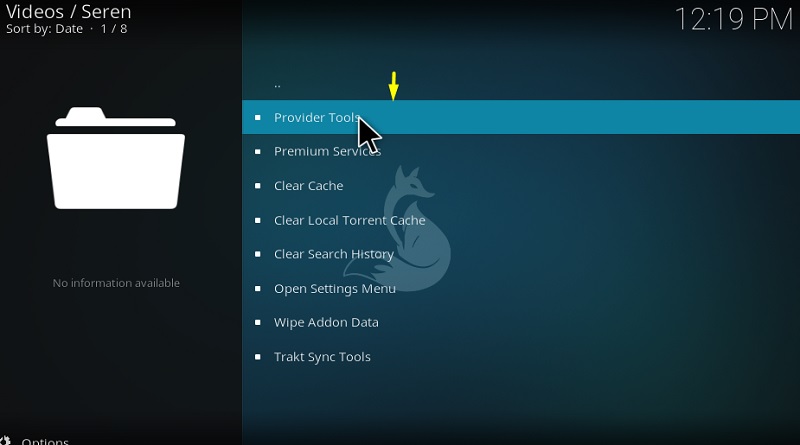
- Launch the Seren Addon and go to Tools Option from the home screen.
- On the next screen, click on the Provider Tools option to proceed further.
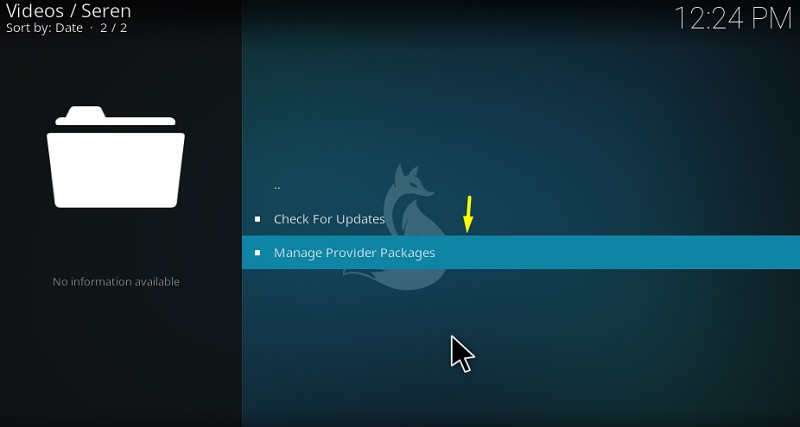
- Click on Manage Provider Packages.
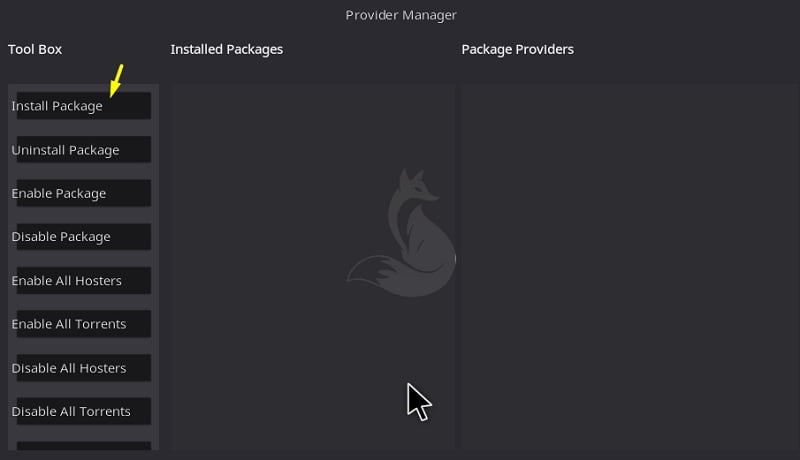
- Now click on Install Package option and wait for the pop-up window to appear.
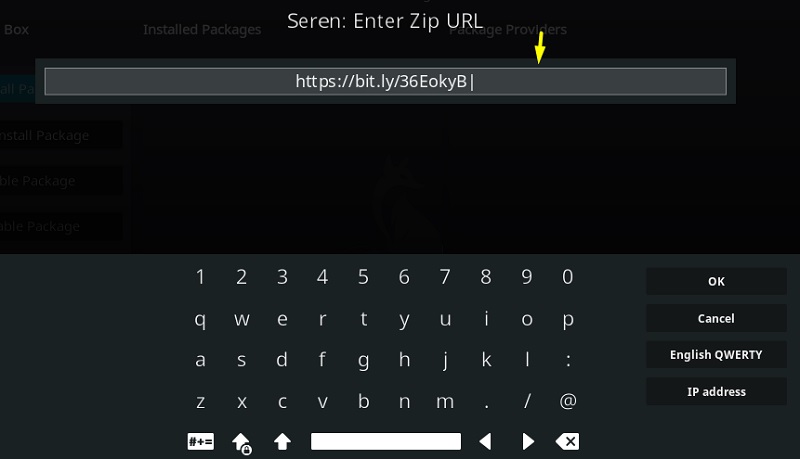
- In the pop-up window, Click on Web Location text and enter the following link in its place.
[https://bit.ly/36EokyB] Ensure the link is properly entered and hit OK to proceed.
- In a few seconds, a tiny pop up window will appear, select Install option in it.
- Click the OK option when the installation is successfully completed.
You should now be able to stream your desired content without any issues. Also, ensure that your real debrid account is active. Make sure that your subscription isn’t expired, otherwise, you’re likely to face similar errors for streaming through Seren addon.
You May Like
- How To Install Covenant Addon On Kodi
- How to Install Exodus Addon on Kodi
- How to Install IT Kodi Addon
Wrapping Up
Seren is a promising option in the best Kodi video addons category at the moment. You might find the installation process lengthy but it’s definitely worth spending time and effort on what it offers in terms of content. Apart from the content, other features like real debrid integration and trakt support make it way more convenient and easy for users to stream their favorite media content. Go ahead and give it a shot yourself!
In case if you’re stuck somewhere in the installation process or if you need any further help, then hit me up in the comment section below. Also, let me know your experience with the Seren addon and share the article with other Kodi users who might find it useful. This brings an end to this article! Enjoy!